How to Use File Uploader With Cypress
In this article, we will discuss how we can upload a file in cypress.
Method i: Using the cypress-file-upload node packet. Let's automate the below Exam scenario:
1. Become to https://the-net.herokuapp.com/upload.
2. Select a file and upload information technology.
3. After upload, validate that the file was successfully uploaded.
Step 1: Install the cypress-file-upload node bundle using the command:
| 1 | npm install --salvage-dev cypress-file-upload |
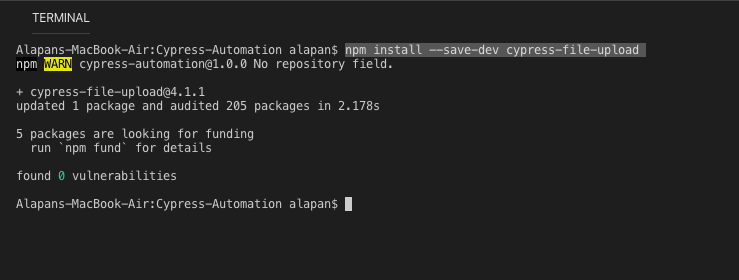
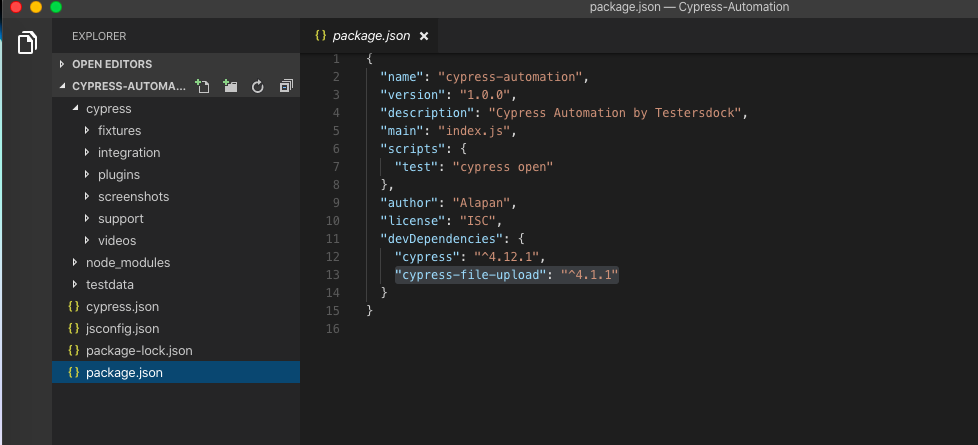
One time you have installed the package successfully, you can see the package name in your package.json file
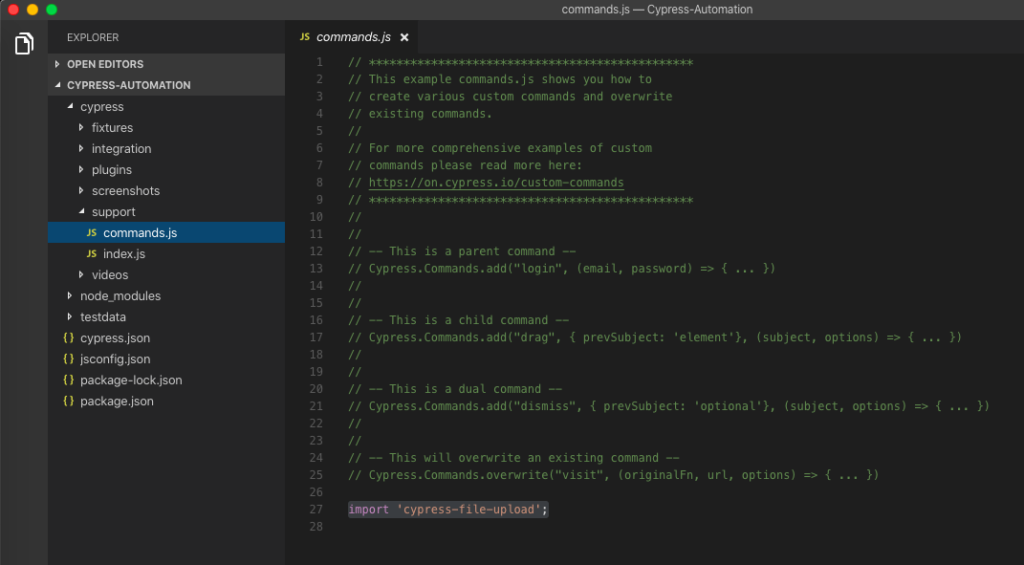
Stride 2: We will at present import the node package in to our cypress project. To import, write the below code in cypress > support > commands.js
| i | import 'cypress-file-upload' ; |
Step 3:
| 1 | describe( 'Instance to demonstrate file upload in cypress', role ( ) { information technology( 'File Upload using cypress-file-upload npm packet', ( ) => { |
| 1 | before(function ( ) { |
This volition open the webpage https://the-internet.herokuapp.com/upload before the execution of it blocks.
| 1 | information technology( 'File Upload using cypress-file-upload npm package', ( ) => { |
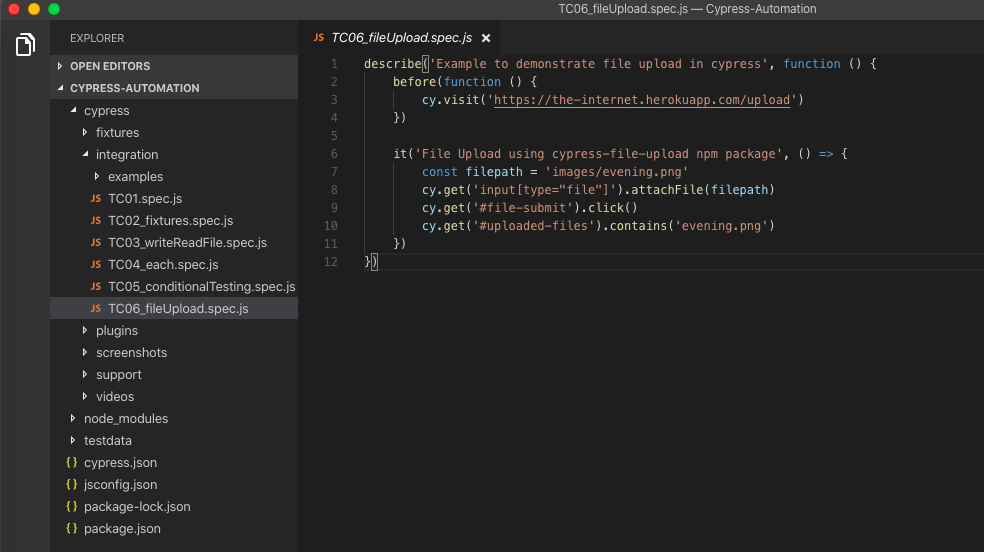
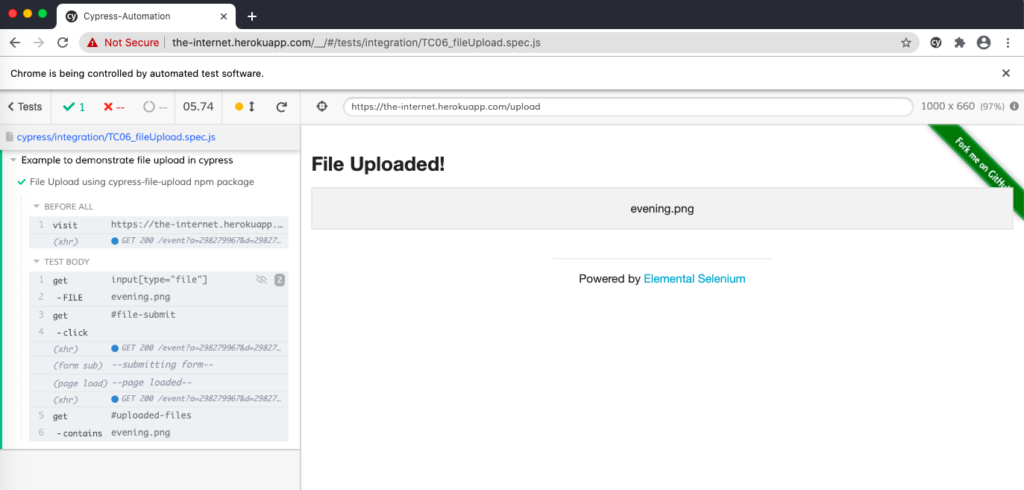
Here we are uploading a file which is located at fixtures > images > evening.png.

In the filepath variable, we are storing the image path. Since cypress always searches for exam data from the fixtures folder so images/evening.png will work fine. cy.get('input[blazon="file"]').attachFile(filepath) volition add together the image file path in Choose file. cy.get('#file-submit').click() will click on the upload button. cy.go('#uploaded-files').contains('evening.png') will check the file name to validate successful upload.
Pace iv: After successful Test Execution:
Method 2: Using the in-built .selectFile() control. This was introduced with cypress 5 9.3.0.
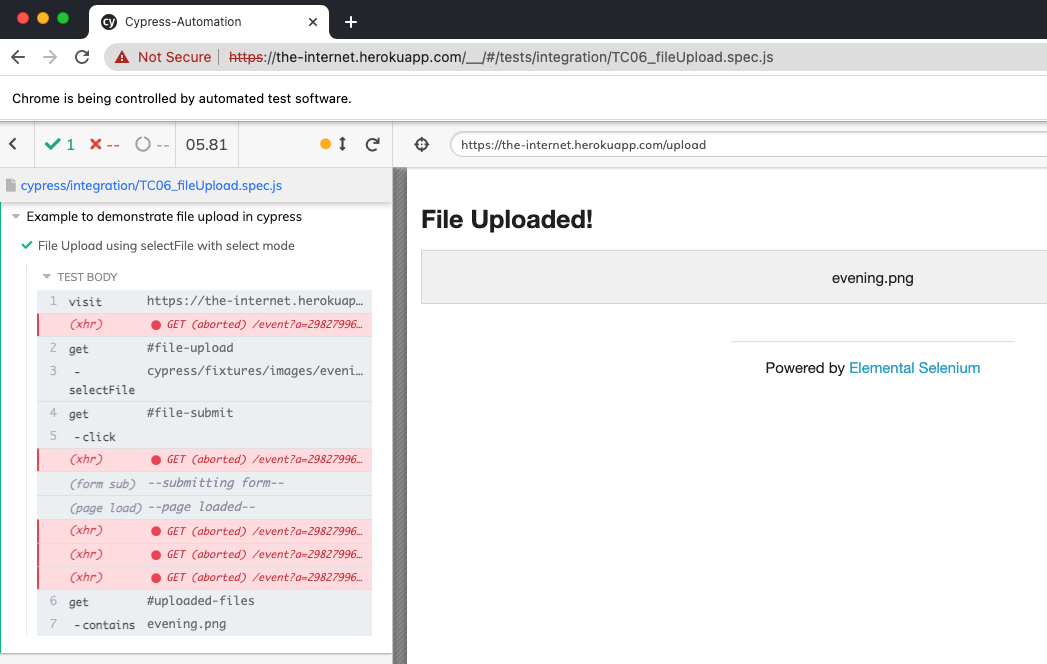
a) File upload using the default 'select' fashion – By default, .selectFile() runs in 'select' manner, mimicking a user selecting ane or more files on an HTML5 input element. In this manner, the bailiwick must be a single input element with blazon="file", or a label element connected to an input (either with its for attribute or by containing the input).
| ane | it( 'File Upload using selectFile with select fashion' , ( ) => { |
Here we are merely passing the location of the file to selectFile and then afterward upload, validating that the file upload was successful. One thing to remember is that the path of the file should exist from the projection root folder. In our case, the file is located under the 'images' folder inside the 'fixtures' folder, hence cypress/fixtures/images/evening.png was used.
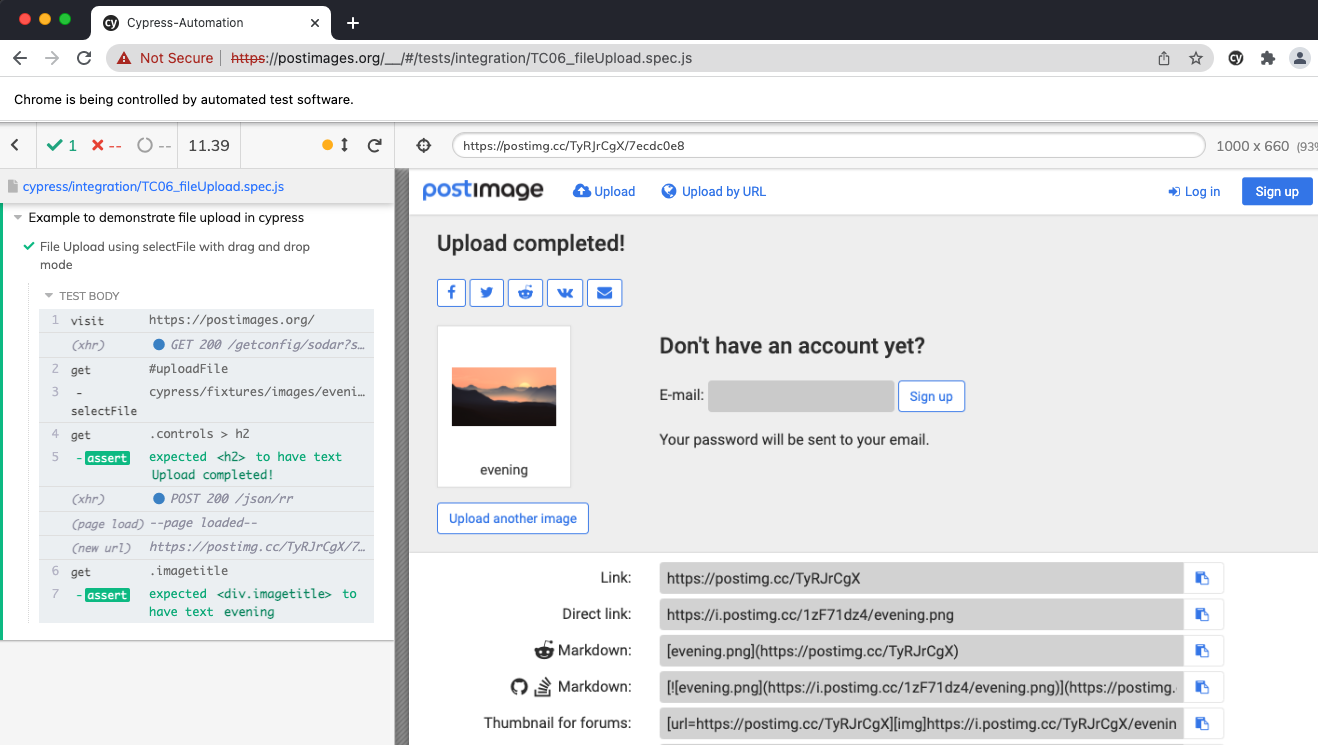
b) File upload using 'drag-drop' mode – Setting the action to drag-drop changes the behavior of the control to instead mimic a user dragging files from the operating system into the browser, and dropping them over the selected subject field. In this way, the subject can be whatever DOM element or the document as a whole.
| 1 | it( 'File Upload using selectFile with drag and drop mode' , ( ) => { |
Here we are using the elevate and drop mode for file upload. This can be achieved past passing { activity: 'elevate-drop' } with selectFile. Afterwards upload, we are validating that the file was successfully uploaded.
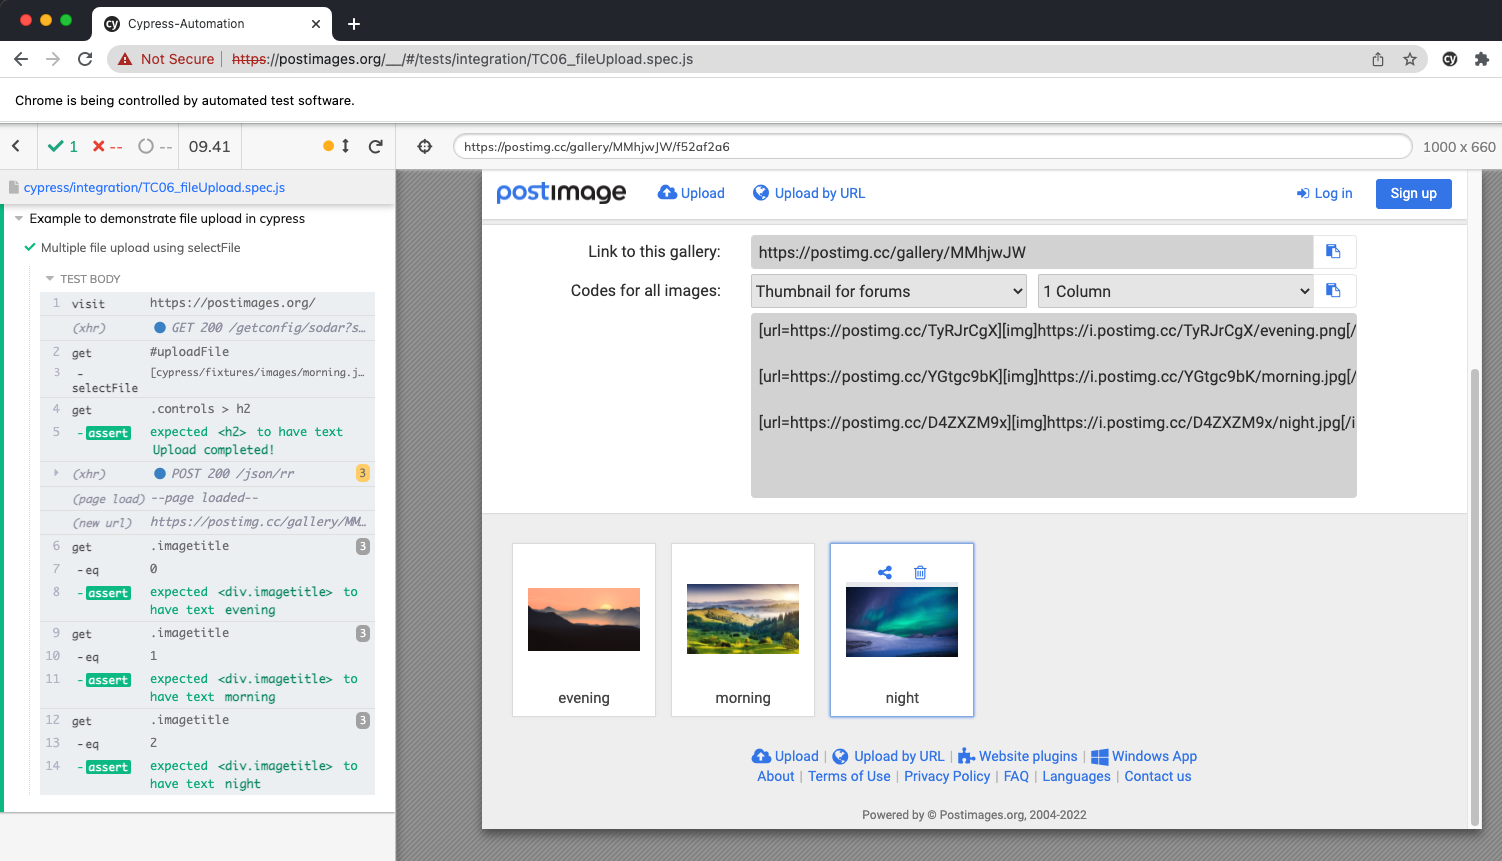
c) Multiple file upload
| 1 | it( 'Multiple file upload using selectFile' , ( ) => { |
Here instead of one file, nosotros are inputting multiple files at one time for upload. This is achieved past passing the file locations as an array to selectFile. Once the files are uploaded we are validating that the upload was successful.
In case you have been previously using the cypress-file-upload plugin and want to move to cypress native command selectFile(), you can check out this migration guide.
Do check out 🙂
Github: https://github.com/alapanme/Cypress-Automation
All Cypress Articles: https://testersdock.com/cypress-tutorial/
Source: https://testersdock.com/cypress-file-upload/
0 Response to "How to Use File Uploader With Cypress"
Post a Comment